Tips for preventing accidents
- Install Anti-Tip kit immediately upon bringing home your new furniture.
- TVs should be placed on sturdy, low bases and not on top of tall dressers or cabinets.
- Ensure that remote controls, toys, and other items that might be attractive to children are not kept on top of high furniture.
- Keep cords from TVs, appliances and other items out of the reach of children to prevent them from pulling these items down on themselves.
- Store heavy items on lowest shelf or drawer available.
For more information and prevention tips, visit these websites:
https://www.canada.ca/en/health-canada/services/injury-prevention/furniture-appliances-televisions.html
https://www.childinjurypreventionalliance.org/furniture-tipovers

Anchoring based on wall type
To ensure your furniture is secure, attach it to the wall using hardware that matches your wall material. If your wall material is not listed, please consult with a local hardware retailer to find the safest option.

The safest way to anchor your furniture is by screwing it directly into a stud in the wall.

For stone, brick or concrete walls, be sure to use a plug with a screw or a toggle-style screw to safely secure your furniture.

Drywall without a stud is the least preferred method of anchoring due to safety limitations. Be sure to use a plug with your screw.
Installing your kit
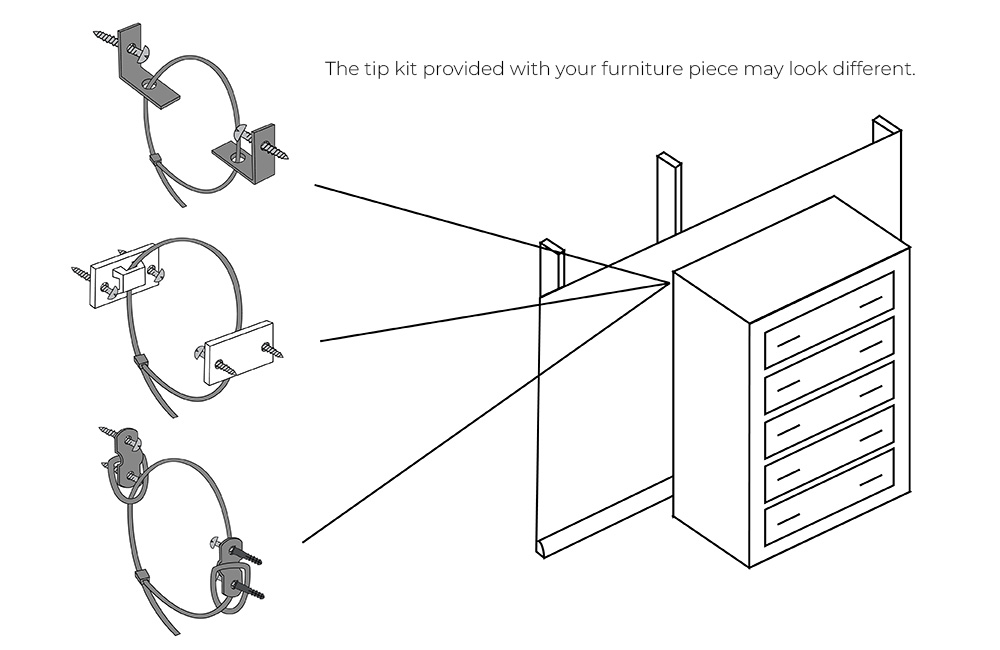
The Anti-Tip Kit includes hardware designed to secure your furniture to a stud in the wall. To be sure you are using the right hardware for your wall type, check with your local hardware store.

Attach a bracket securely to the top back of the furniture piece using the 5/8” screw provided, through the smaller hole.

Attach the other bracket to the wall 2 inches below the mounting bracket secured to the back of your furniture piece. Attach bracket to the wall using the 2” screw provided, through the smaller hole.

Place the furniture piece into position so that both mounting brackets are vertically in line and lace the end of the restraint strap through the larger hole in each mounting bracket. Bring both ends together and slide the flat end through the locking end and draw it through until all slack is removed.


